
When running secure systems, it is often necessary to separate functionalities and provide isolation between critical components, something which can be done with a hypervisor. On SoC-based embedded systems, some of the critical components might be implemented in FPGA fabric, which complicates the separation of higher and lower criticality tasks. Multiple tasks must be able to securely share a single interconnect between the ARM processor and FPGA fabric. If the interconnect is not shared properly and securely, an attacker who has compromised a vulnerable application could pivot to intercept and even modify data sent across the interconnect.
So how can an embedded system share an interconnect securely? In this two-part blog series, we will show how to configure the FPGA design to leverage the System Memory Management Unit (SMMU) and how to leverage this FPGA design along with a hypervisor to provide proper separation of AXI transactions between two virtual machines.
The key to sharing a DMA-capable PL device is in adding appropriate side channel information which enables the SMMU to differentiate and control the memory access of the custom logic IP. After adding this side channel information, the SMMU can either be used by the host operating system to protect the application from malicious or errant DMA transactions or can be used by a hypervisor to securely provide a DMA-capable PL device to a virtual machine.
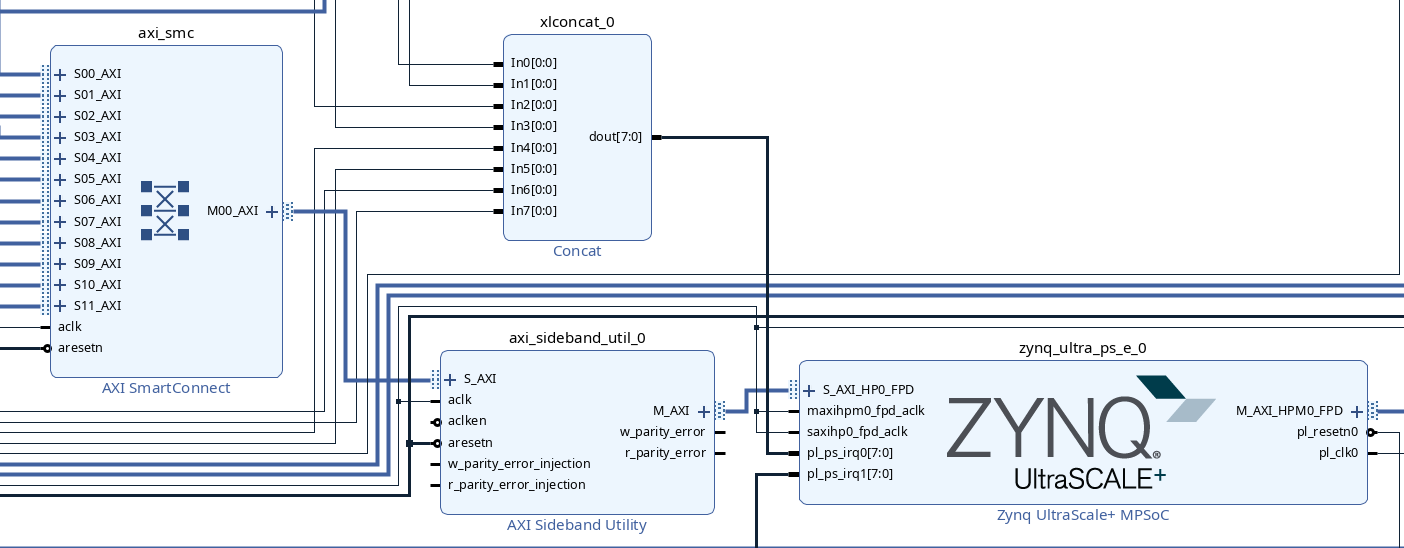
For this example, we will be using the EthernetFMC AXI design (https://github.com/fpgadeveloper/ethernet-fmc-axi-eth) on the ZCU102 development board. Upon initialization of the Vivado project, there is an AXI SmartConnect which is connected directly to HP0 on the MPSoC:

To ensure that the AXI master IDs are preserved, we need to insert an AXI Sideband Utility:
The result should look like this:
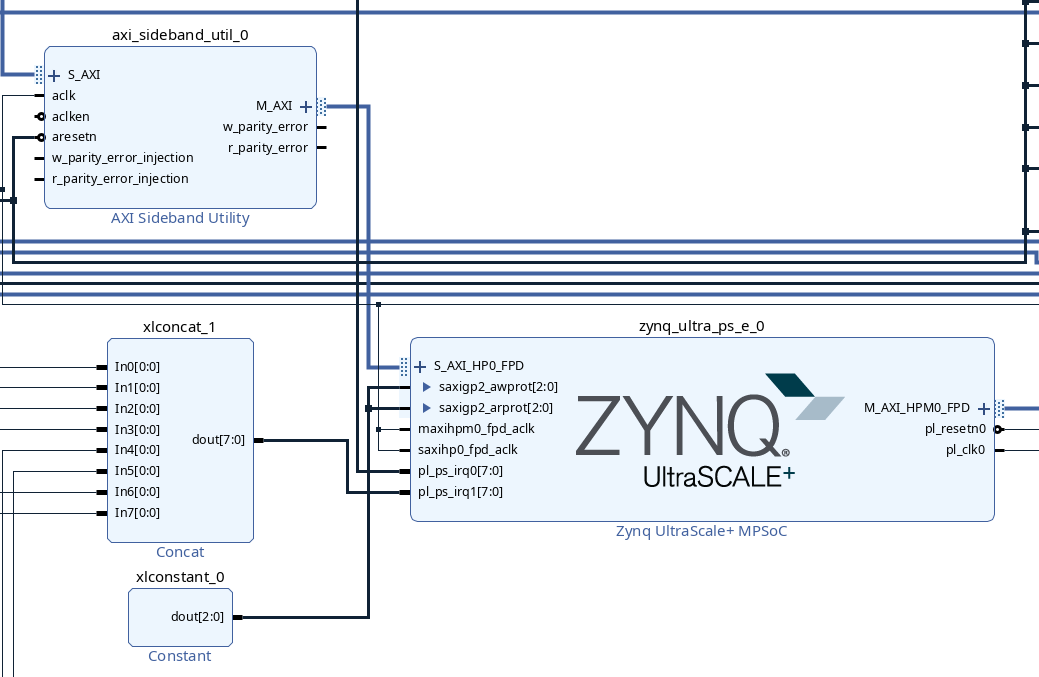
Because the SMMU of the XiAMDlinx MPSoC only has a Normal world context, and therefore cannot be used with interconnect traffic which has the Secure world bit set, the next step is to override the protection bits of the MPSoC’s slave port, forcing the interconnect to generate normal transactions. To do this, add a Constant IP block. Double-click it to configure it, and set it to be 3 bits wide with a value of 0b010. Finally, expand the interconnect on the MPSoC and connect the constant to the awprot and arprot signals. With both the Sideband Utility and Constant blocks added, your block diagram will look like this:
Lastly, we will update the device tree of the system to include SMMU configuration information. Export the hardware description from Vivado and use Vitis to generate a device tree which includes the additional devices that are implemented in logic. To add the SMMU, we first need to find the Stream IDs that are in use in our design. Our PL design uses interconnect HP0. Using the ZynqMP Technical Reference Manual, we find that this corresponds to TBU 3 (Table 16-4). From Table 16-13, we get that the Master ID is 0b1010 concatenated with the AXI ID, which is just the connections to our SmartConnect in order. We have 12 connections to the SmartConnect, giving us Stream IDs 0xE80 through 0xE8B:
| TBU | Master ID | |||||||||||||
|---|---|---|---|---|---|---|---|---|---|---|---|---|---|---|
| Master ID [9:6] | AXI ID [5:0] | |||||||||||||
| 000 | 11 | 10 | 10 | 00 | xxxx | |||||||||
| 0 | E | 8 | x | |||||||||||
| 0xE8x | ||||||||||||||
Once we have the correct Stream IDs, we can add them to the new device tree by adding the iommus node to each Ethernet DMA. Here is an example of a DMA at address 0xa0040000 with the additional iommus node:
axi_ethernet_0_dma: dma@a0040000 {
	#dma-cells = < 0x01 >;
	clock-names = "s_axi_lite_aclk", "m_axi_sg_aclk", "m_axi_mm2s_aclk", "m_axi_s2mm_aclk";
	clocks = < 0x03 0x47 >, <  0x03 0x47 >, <  0x03 0x47 >, <  0x03 0x47 >;
	compatible = "xlnx,eth-dma";
	interrupt-names = "mm2s_introut", "s2mm_introut";
	interrupt-parent = < 0x03 >;
	interrupts = < 0x00 0x5b 0x04 0x00 0x5c 0x04 >;
	reg = < 0x00 0xa0040000 0x00 0x10000 >;
	xlnx,addrwidth = [20];
	xlnx,include-dre;
	xlnx,num-queues = /bits/ 16 < 0x01 >;
	phandle = < 0x18 >;
	iommus = < &smmu 0xE80 >, < &smmu 0xE81 >, < &smmu 0xE82 >;
};
With the device tree updated, we are done making changes to the hardware! The Linux DMA subsystem can now leverage the SMMU to provide hardware protected DMA mappings to the device drivers. Further system separation can be provided by utilizing a hypervisor that knows about the PL devices and can pass these devices through to separate VMs. We demonstrate such a configuration in the next part of this blog series.
As shown by this example, securing SoC hardware can be done with some simple steps but can also require detailed device knowledge. If you need any additional help securing your SoC-based embedded system, schedule a meeting with our team and turn your ideas into reality.